Full JSONPatch support in JSONBuddy

JSONPatch allows modifying JSON data with a set of operations defined itself as a JSON array. JSONBuddy 5.1 supports the complete JSONPatch specification directly in the editor to apply any number of operations to any number of JSON documents.

Just a few details to get an idea what JSONPatch can do for you. A simple JSONPatch operation could look like the following example:

[ { "op": "copy", "from": "/baz/0", "path": "/boo" } ]

In words, this operation copies the value from the JSONPointer “/baz/0” to the location at the JSONPointer “/boo”. So applied to the following JSON input:

{
"baz": [ { "qux": "hello" } ],
"bar": 1
}

You get the following JSON as result:

{
"baz": [ { "qux": "hello" } ],
"bar": 1,
"boo": { "qux": "hello" }
}

As you can see, the value from the first item of “baz” array is copied to the root as a new value named “boo”. It doesn’t matter, that the “boo” property didn’t exist beforehand.

Apply JSONPatch operations from the built-in File Explorer.

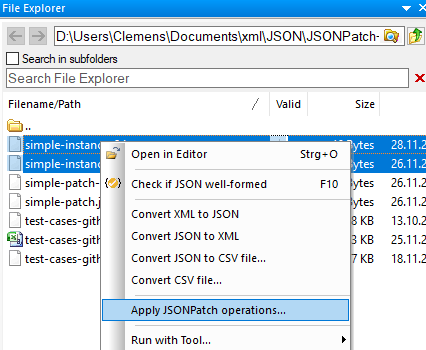
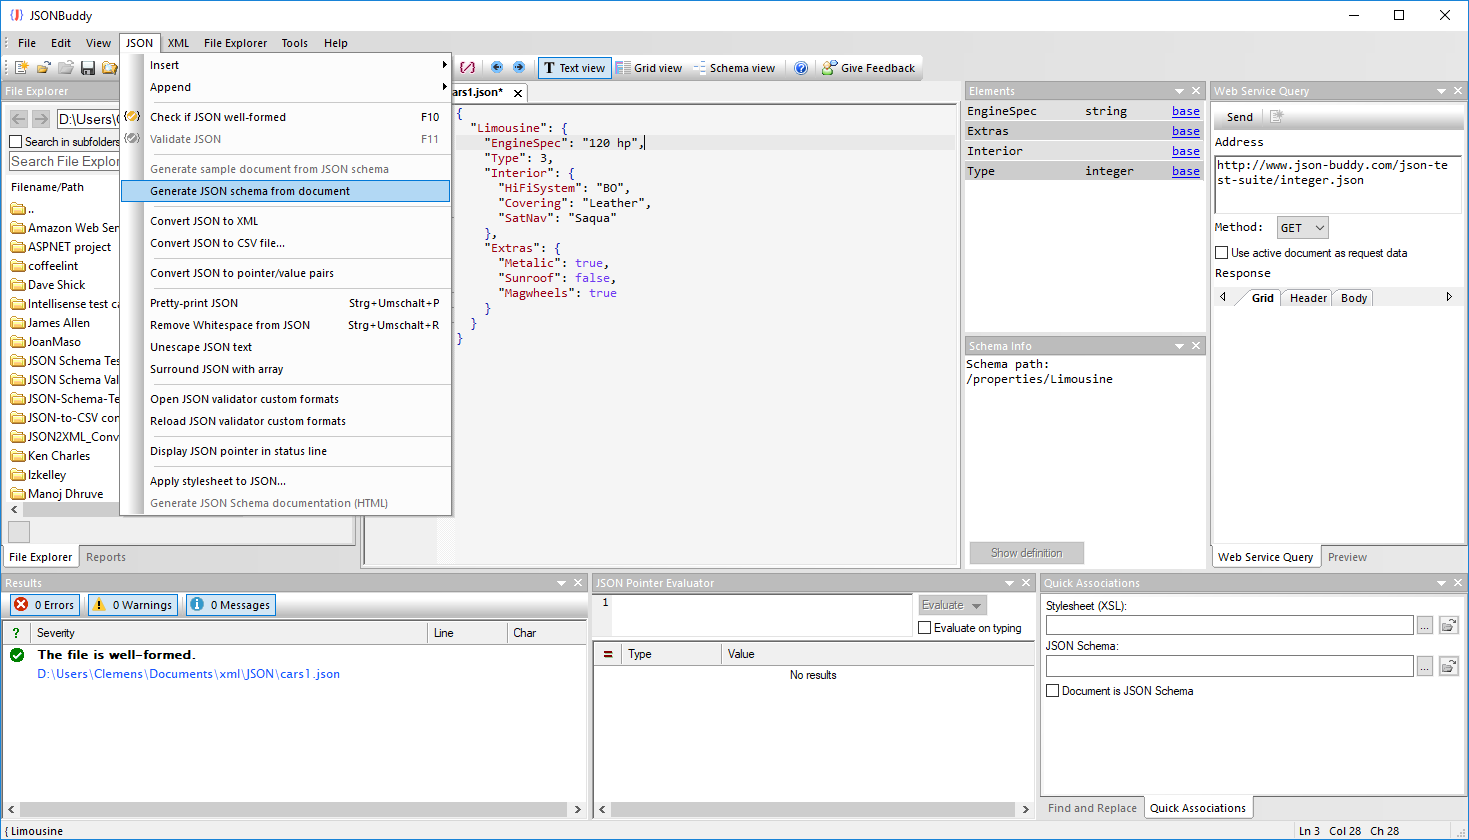
If you want to apply JSONPatch operations to one or more JSON data documents, select the files in the built-in File explorer first. Then use the context menu to get a standard file dialog to select the JSON with the array of JSONPatch operations.

Apply the JSONPatch operations to the active document

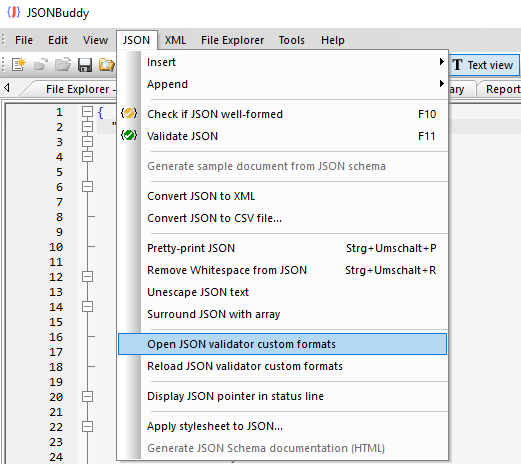
If you want to modify the current JSON document in the editor using JSONPatch operations, set the focus to the document and use the “JSON | Apply JSONPatch operations…” command from the main menu bar. This will also open a standard file dialog where you can select the JSONPatch operations to apply.

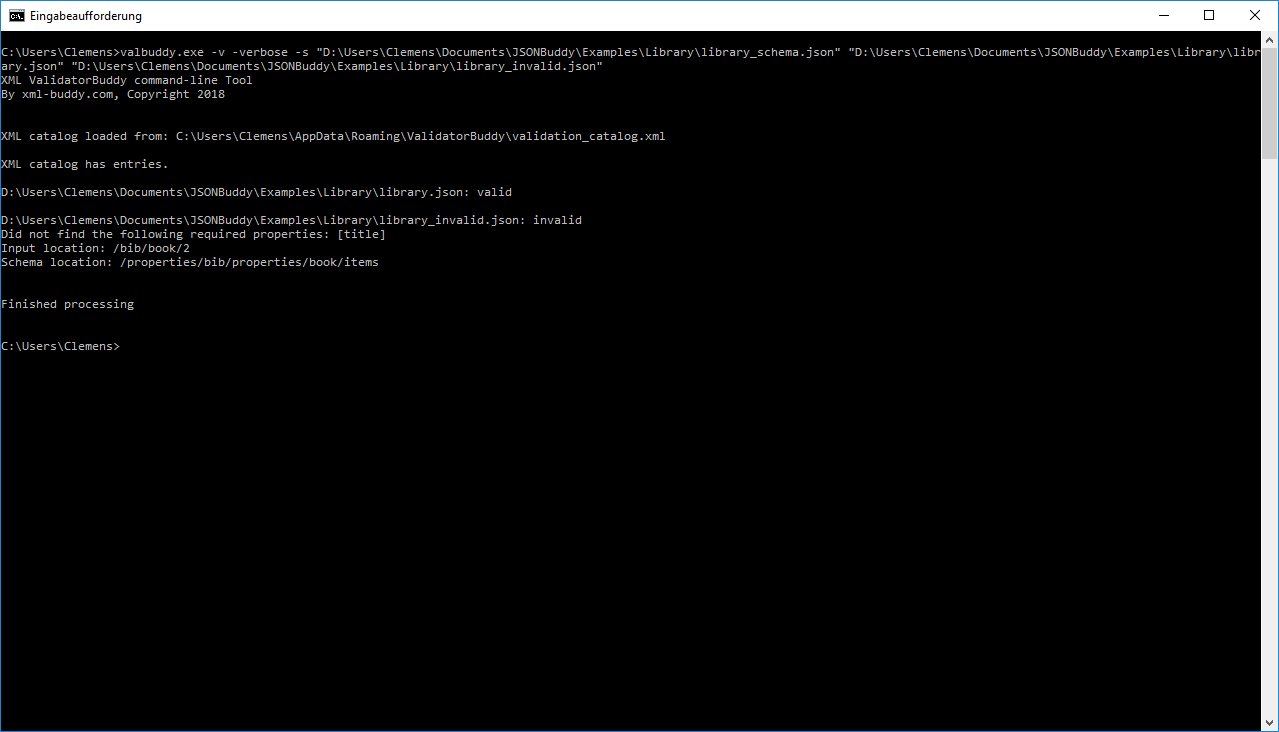
Use JSONPatch from the command-line tool

In addition, the latest command-line tool has also support for JSONPatch. Simply use the “patch” option to apply a set of JSONPatch operations to any number of JSON data files:

valbuddy.exe -patch "D:\Documents\JSON\JSONPatch-Test-Suite\simple-patch.json" "D:\Documents\JSON\JSONPatch-Test-Suite\simple-instance.json"

Where the first parameter after the “patch” switch is always taken as the JSON input with the array of JSONPatch operations. All following parameters are taken as paths to JSON documents to apply the modifications.

As usual, you find the “valbuddy.exe” command-line tool in the installation folder of the JSONBuddy editor software package.

Download the free JSON validator command-line tool

You are not only looking for the best JSON editor for data files and JSON schemas? You are working on a Windows system and you need to quickly validate one or multiple JSON data files from the command-line? Then you should try the free JSON validator command-line tool for Windows from json-buddy.com.

  • Check one or multiple JSON documents against a JSON schema with a single line from the Windows shell.
  • Get a comprehensive validation report with a detailed error message and full location information as JSONPointer.
  • Support for the popular JSON Schema draft 4, draft 6 and draft 7 (Update: Support for draft 2019-09 was added in the meantime).
  • Easy to use installer package. No additional configuration is required.
  • Free for commercial and personal use. Just request a free license after the 14-day evaluation period.
Sample validation output in the console window.

Please note that the tool also supports XML validation against a W3C schema. To get a complete list of switches, execute valbuddy.exe from the installation folder without any parameters.

Enhanced batch validation using a configuration file for simple folder validation and log file creation requires a license for JSONBuddy or XML ValidatorBuddy.

Convert JSON to CSV: Generate pointer/value pairs from your data

JSONBuddy already supports converting JSON data to CSV (and also back from CSV to JSON…). You can learn more about the standard JSON to CSV dialog on the help pages. Starting with JSONBuddy 5, there is a new way to generate CSV output from JSON input in the editor: The “Convert JSON to pointer/value pairs” command.

To illustrate this method, we take the following JSON input as an example:

library.json from the example files coming with JSONBuddy

And we use the “JSON | Convert JSON to pointer/value pairs” command from the editor, which is applied to the active document, to get the following CSV output:

CSV output from library.json

This CSV output contains all the data from the JSON input to create the original JSON structure again.

  1. The left column is the JSONPointer where the actual value is located. The pointers contain the objects, arrays and property name information of the JSON input.
  2. The right column is the JSON value. This also means the number of lines in the CSV output equals the number of single JSON values in the input data.

Of course, you can edit and save the CSV data in the JSON editor and take it as input to other tools like Excel.

JSON editor in a nutshell: How to assign a JSON schema

The JSON schema specification defines no way to assign a schema to a JSON data file. The schema used for validation is either set by the application or by any meta-data like transmission headers or even filename patterns. As an editor for JSON schema, JSONBuddy needs to support methods to assign a JSON schema to the JSON data you are currently working on. Here are some ways to set the schema for your data:

Assign a local schema file using the “Quick associations” pane

The most straightforward way is to use the “Quick associations” pane of the editor to select a local JSON schema file from disk for the current document. This assignment is saved and restored the next time you open the instance in the JSON editor.

Open a JSON schema from schemastore.org and automatically generate sample data

This method is explained in more detail in this article. You can use the “Open from JSON schema library…” dialog in the editor to automatically generate sample data from any schema available at schemastore.org. The schema is also assigned to the generated JSON instance.

The file-name is matching a specific pattern

A lot of entries in the JSON schema library available at schemastore.org are also defining a file-name pattern which is used to load a schema from the library to validate the JSON data. For example, if you load a JSON document with the name “test.bower.json” the data is recognized as “Bower package description file” and you get the following message in the results window of the editor:

Automatically assigned Bower schema from schemastore.org

Generate sample data from any JSON schema

As a quick way to get a JSON instance from any schema use the command to generate sample JSON data. This way a new document is created in the editor and the source schema is also assigned in a single step.

JSON schema editor with $ref resolving

Being able to navigate quickly and conveniently in your JSON schema can make a big difference while you are working on your schema definitions. Here is a sample screen-shot directly from the JSON schema editor environment of JSONBuddy of the “Unity Assembly Definition” schema available at schemastore.org:

The editor resolves the target locations of all $ref keywords in the current schema and displays them as active links. The resolved JSON pointer and the path to the schema are shown as part of the info window if you move the mouse over the reference.

You get instant feedback if the $ref value can be resolved together with the target location and you save time by clicking the link if you need to take a closer look at the schema node.

Amazing navigation features

Hold down the Control key and left-click on the link to jump directly to the resolved JSON schema node.

An additional tip to quickly navigate in the JSON schema editor: Use the Navigation-history back shortcut “Control-Shift-,” to jump back immediately to the $ref keyword.

Altogether some outstanding enhancements for the JSON schema editor.

Using the built-in JSON schema generator

Do you want to quickly generate a basic JSON schema in your editor from any JSON input to avoid some typing that needs to be done every time you start writing a schema? A quick skeleton schema as a starting point with all current properties defined and their integral types already resolved? If yes, you can do this in JSONBuddy with ease.

This is how you do it in the editor:

  1. Open your JSON data as document. It doesn’t matter if you use the text or grid view.
  2. Use the following command to open a new document with the generated JSON schema: “JSON | Generate JSON schema from document”.
Generate a JSON schema from the current document in the editor

The generated schema is opened as a new document in the editor. Integral types are resolved and all objects which are not part of the top level are added as definitions to the schema. Equal object definitions will only appear once.

Automatic schema generation in the background

But even if you don’t use the command to generate a schema, a JSON schema is automatically generated in the background for any JSON document with currently no schema assigned. This schema is used to fill the Elements pane and to provide the entry-helper windows.

JSON editor and validator for large schemas

Sometimes it can happen that a JSON schema is generated from existing data and the resulting schema is quite huge. And maybe this schema is just taken as a starting point and you need to extend or modify it to get the final specifications for your JSON input.

One example of a really huge JSON schema is the Ansible schema available from schemastore.org (Please take a look at this blog entry to see how easy it is to open any schema from schemastore.org in JSONBuddy). The Ansible schema has currently more than 100.000 lines and 5 MB of JSON text. For this task, you need a good JSON editor which can also handle quite large files.

JSONBuddy: The editor for large JSON schemas

JSONBuddy is capable of loading big schema documents. The editor will apply syntax-coloring, entry-helpers and code folding as it does for a typical schema. You also don’t have to work on your schema without the context-sensitive help of getting the specification text for the keyword you are currently editing. All of this is also functional for big schemas.

But there is more. For example, besides being able to edit a JSON schema as you are used to, you get an instant evaluation from the built-in JSON schema analyzer. The schema analyzer runs in the background and is also active for large schema documents. For example, if a certain definition is not used in the local schema, there is no need to run an explicit find operation:

Inserting a new definition in a JSON schema with more than 100k lines

And this also works the other way around, whenever you add a $ref keyword to your JSON schema in the editor, the analyzer will tell you if the referenced definition can be successfully resolved.

“And do I get those nice validation error indicators which are saving so much time on editing my JSON content in the editor?” Yes, you do:

Active background validation on using a huge JSON schema

JSON editor in a nutshell: Using JSON pretty-print

Maybe, you often have to deal with JSON data which is not formatted as you like or has no white space at all. As an example, it is hard to edit this JSON text in the editor:

JSON data with no white-space is hard to read
JSON data with no white-space

What you need is an editor that a) understands the JSON syntax and b) can quickly format your JSON data hassle-free.

Format JSON data with no white space in the editor

In JSONBuddy, just use the pretty-print feature to format the current text content at any time. The keyboard shortcut for the pretty-print command is Ctrl+Shift+p (you can change the shortcut in the “Options…” dialog). There is also a menu item at “JSON | Pretty-print JSON”. After the formatting the JSON data is much more readable and can be easily modified in the editor:

JSON data after running the pretty-print command.

Note that short array content is aligned at a single line (available with JSONBuddy 5). This makes the JSON more compact and is saving space in the editor window. This is also true for arrays with only primitive types and having no long string values. As a consequence, arrays with many items of only primitive types, often numbers, are still displayed in a compact way with no new-lines separating the single items. In contrast, arrays with long string values are displayed with each item on a new line to increase readability. The editor applies an adaptive JSON formatting based on the actual content.

Use pretty-print in combination with the navigation history

The pretty-print functionality is getting even more powerful in combination with the navigation history of the JSON editor. If you format your JSON data while you are adding new properties, objects or arrays, the navigation history sets the text selection to the current property, after you applied the formatting operation.

You can also use the “Navigate Backward Ctrl+Shift+,” and “Navigate Forward Ctrl+Shift+.” commands to navigate through the selection history as you need.

Custom formats for the JSON validator

Starting with JSONBuddy 4.6, you can add custom formats for the JSON validator as regular expressions using a simple configuration file. The JSON editor has got two new commands to give you easy access to this new functionality:

Commands for JSON custom formats

How to add and use custom formats?

Use the “Open JSON validator custom formats” command to open the JSON configuration file for custom formats directly in JSONBuddy. This is a standard JSON document and the default one will be loaded in the editor. You can then add your own entries to the JSON array for your validation tasks. Please note that you can also replace some existing formats which are already provided by the JSON validator of JSONBuddy. A user-defined format will override the built-in definition.

The standard configuration has the following entry:

[
  {
    "format": "my-custom-format",
    "regex": "^[a-z, A-Z, /]+$"
  }
]

As you can see all you need to do is to provide two simple strings to add a custom format. The identifier of the new format and a (valid) regular expression. After you have finished adding your new entries you simply save the configuration file and activate the new formats with the “Reload JSON validator custom formats” command. All open JSON documents are immediately validated using the new format definitions.

You can also see the names of your own formats on editing your JSON data in the editor:

library example with custom format definition

The “library” example, which is part of the standard installation, also uses a custom format. Just check it out and play around with different regular expressions.

Tales from support: JSON code folding

Someone who set “Recommend: yes” and “Overall quality: 1” (best) on the survey form sent the additional following feedback:

Code folding for JSON file does not work for situations like: “RaceCar”: { “Domestic”: true, “Model”: [] }

Unfortunately, the user did not provide an email address so I couldn’t get in contact with her/him. So what is the JSON editor doing with JSON data like this in terms of code folding? The sample data is all in one line. There is actually no chance for the editor to show code folding for JSON content that spans over a single line.

Use JSON pretty-print to show code folding

However, if you are using JSONBuddy as your JSON editor you also get a very useful pretty-print functionality that can be quickly executed by just pressing Ctrl-Shift-P. The sample JSON is immediately formatted in the following way:

Formatting JSON with pretty-print in JSONBuddy

As you can see, folding is available after the JSON data is formatted in the editor. It is also convenient that the current selection is also preserved after the pretty-print operation is completed. Maybe a small but important detail to provide the best JSON editor experience possible.