Configure and use JSON schema pools for validation

The JSON schema standard does not define a way to reference local or remote schema files for validation from within the JSON instance document. A JSON validator needs to support a way to load and assign schemas to the JSON data. Just setting a single root schema is not sufficient, if the schema itself references other components with $ref and $id. A JSON schema is identified by its $id and not by a local or remote path (Uri).

To address this, a schema pool can hold any number of JSON Schema files. One of those schemas is also set as the root schema in the configuration file.

Selecting a JSON Schema pool

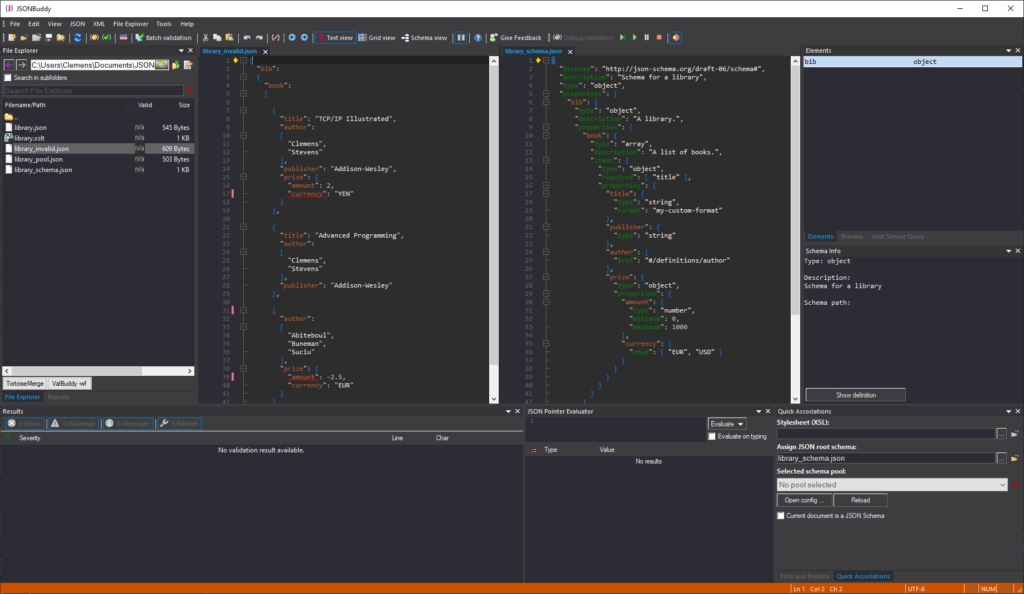
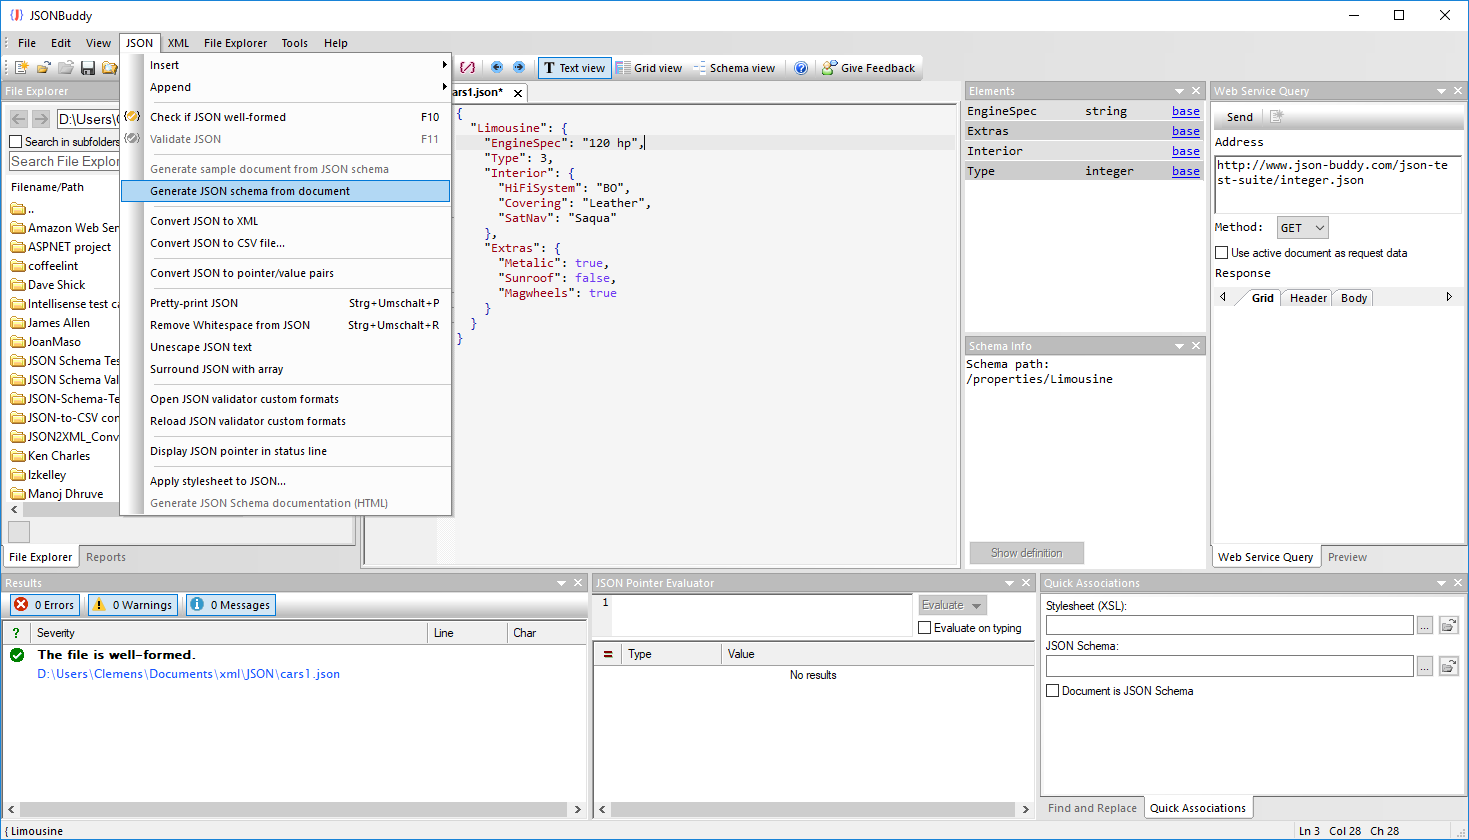
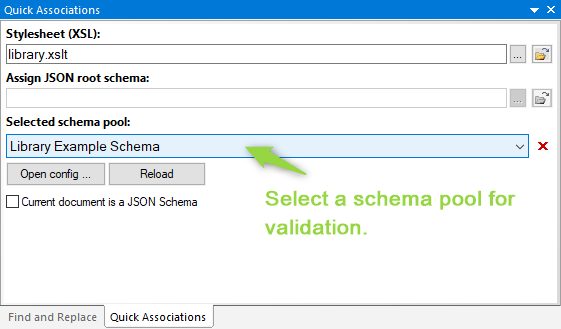
In JSONBuddy, a schema for the active document can be selected using the Quick Associations pane. You can either set a pool or a local or remote path to the root schema as an alternative. If a schema pool is selected, the edit field to enter a path is disabled. The current schema pool assignment can be cleared with the red X button to the right.

Select a JSON Schema pool

The schema pools configuration file

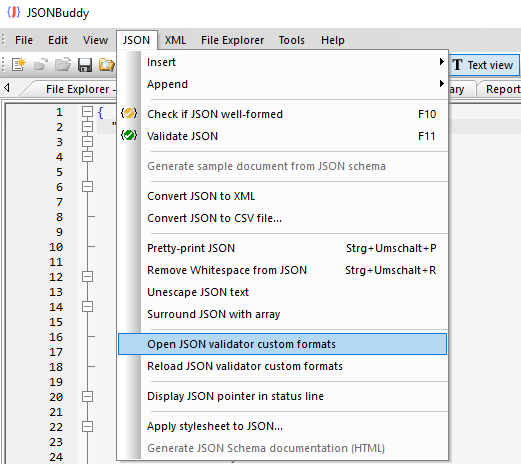
All available JSON schema pools are configured using a settings document. This JSON file can be opened in JSONBuddy with the “Open config…” button. Add and edit the single pool entries directly in the JSON editor to change the configuration. Save the JSON file as usual and use the “Reload” button of the “Quick Associations” pane to apply the modifications to the schema pools used for JSON validation.

Here is an example of a simple schema pools configuration file:

[
  {
    "id": "1948DF5D-0765-4939-9F88-64CD3BB1D306-0",
    "title": "Library Example Schema",
    "version": 1,
    "rootIndex": 0,
    "entries": [
      "SchemaPools\\Library\\library_schema_root.json",
      "SchemaPools\\Library\\library_schema_book.json"
    ]
  }  
]
PropertyTypeDescription
idstringA unique identifier of the pool within this configuration file.
titlestringTitle to be displayed.
rootIndexintegerZero-based index to set the root schema of this pool. If omitted, the first entry is taken as root schema.
entriesarrayAn array of strings with local or remote (Url) paths to the schema documents. For local paths, the entry can be a relative path with the configuration file as the base.
Properties of a JSON schema pool entry.

Introducing the JSON Schema validation debugger

You got a JSON Schema written by someone else and have difficulty understanding why your data is not checked as you expected? Wouldn’t it be nice if you could step through the validation process and learn how the schema is applied to your JSON? Are you already thinking about a JSON Schema validation debugger?

You changed something in your JSON Schema and you want to be sure quickly, that your instance location is still validated? Setting a breakpoint in your JSON data would be very helpful in this case.

You check a huge JSON document with thousands of lines and you want to see in seconds what schema part validates a certain key? Just use the debugger and set a breakpoint at any JSONPointer location.

Well, there is a JSON editor available where you can do this and even more. Just start JSONBuddy Plus and run the JSON Schema validation debugger with a single click:

Starting the JSON validation debugger

The JSON editor will then arrange the instance document to the left and the root JSON Schema file to the right. The locations of the first validation steps are marked with yellow arrows in the left margin areas of the editor windows. The current lines are also indicated with an alternative background color. Therefore, the current validation step is always clearly visible.

Debugging commands

The debugger toolbar

You can find all of the usual debugger commands in the toolbar. Often it will be quicker to use the keyboard. Press F8 for a single step and Ctrl+F8 to run until the next breakpoint or validation error. There is also an option to toggle if the debugger should break whenever a validation error occurred.

A breakpoint can be set in the instance document and any referenced JSON Schema file with the right-mouse-click context menu in the text editor window.

Set a breakpoint in the JSON instance document
Debugging stopped at a breakpoint

Getting a deeper understanding of the JSON Schema validation process is only one reason to use the debugger. It saves a lot of time on getting a schema ready for production. But don’t forget to restart the debugger session if you modify any of the JSON Schema files.

Editing the JSON input data while debugging

Furthermore, it is possible to edit the JSON data while the debugger session is active. Jump from error to error to resolve and fix any issues in the instance.

Validation stopped in JSON debugger at an error.

In order to give additional details about the error, all of the usual context information and indicators are also available while running the debugger. As a consequence, it is often easy to apply the fix.

Fixing the error and continuing with debugging

Please note, that major changes to the structure of the JSON input can result in making it impossible for the debugger to find any subsequent error locations. In this case, it is recommended to restart the validation in the JSON editor.

Don’t underrate the benefits of a debugger

Learn about the details of an unknown schema. Resolve errors in JSON data step by step. Not to mention, check if a property is validated in huge JSON documents quickly. The benefits of having a validation debugger in your JSON editor are numerous.

Full support for JSON schema draft 2019-09

JSONBuddy 6 was released on June, 12th 2021. One of the major new features in the JSON editor is the full support of the JSON Schema draft 2019-09. This means the built-in validator is passing all test cases of the official test suite (around 1000 cases). Hence, JSONBuddy enables you to write and test JSON schemas for all popular drafts.

A JSON linter for JSON schema

If you follow the JSON schema Slack workspace or the JSON schema tag at StackOverflow, you will notice that schema authors are often struggling with the same problems while writing a valid and working JSON schema.

A type specifier or a schema keyword is mistyped, an unresolved $ref because the target is missing or the pointer is not correct or a required property is not defined. It is usually easy to fix those errors but unfortunately, it often takes a long time to find them.

Saving time while creating JSON schemas

This is the point, where the built-in JSON Schema analyzer of JSONBuddy can help you to save a lot of time and hassle if you use the tool as your JSON Schema editor. The analyzer is a linter for JSON schema and runs in the background while you are working on your schema. Whenever the schema linter finds something to report, you will get a message in the results window.

Let us take a quick look at an example from the real world.

Someone removed a definition from the JSON schema

You are working on a big schema and someone from your group removed a definition accidentally. The next time you open the JSON schema, JSONBuddy will show you the following message:

JSON schema linter message about an unresolved $ref

This allows you to fix the error right away. You can go to the version history of the JSON Schema in your repository and revert the change to get the definition back.

If you want to learn more about the JSON schema linter in JSONBuddy, take a look at the following page: JSON schema analyzer – Get a unique companion while editing your JSON schemas.

JSON Schema in the wild: A missing required property

There are some issues that happen over and over again if you write JSON schemas with a plain text editor. You can often follow them in the Slack community for JSON schema or at StackOverflow: A schema is modified and the validation is no longer working as before but nobody knows about it at the time the schema was changed.

The good news is: The built-in JSON schema analyzer in JSONBuddy can detect a lot of those issues while you are editing your schema in the JSON editor.

A while ago this happened to a user: A property was removed from the JSON Schema but was still present in the “required” keyword array. As a consequence, a lot of the JSON data was invalid.

Use an extraordinary JSON schema editor

This can’t happen if you use JSONBuddy as your JSON schema editor. Because the built-in schema analyzer reports the missing required property definition right at the time when you are editing your schema. Instead, you get the following warning:

Warning about a missing required property.

This and several other common issues are reported by the schema analyzer if you use JSONBuddy as your JSON schema editor. Providing you with exceptional support when working with JSON Schema documents helps to save time and avoid extra work.

Download the free JSON validator command-line tool

You are not only looking for the best JSON editor for data files and JSON schemas? You are working on a Windows system and you need to quickly validate one or multiple JSON data files from the command-line? Then you should try the free JSON validator command-line tool for Windows from json-buddy.com.

  • Check one or multiple JSON documents against a JSON schema with a single line from the Windows shell.
  • Get a comprehensive validation report with a detailed error message and full location information as JSONPointer.
  • Support for the popular JSON Schema draft 4, draft 6 and draft 7 (Update: Support for draft 2019-09 was added in the meantime).
  • Easy to use installer package. No additional configuration is required.
  • Free for commercial and personal use. Just request a free license after the 14-day evaluation period.
Sample validation output in the console window.

Please note that the tool also supports XML validation against a W3C schema. To get a complete list of switches, execute valbuddy.exe from the installation folder without any parameters.

Enhanced batch validation using a configuration file for simple folder validation and log file creation requires a license for JSONBuddy or XML ValidatorBuddy.

JSON editor in a nutshell: How to assign a JSON schema

The JSON schema specification defines no way to assign a schema to a JSON data file. The schema used for validation is either set by the application or by any meta-data like transmission headers or even filename patterns. As an editor for JSON schema, JSONBuddy needs to support methods to assign a JSON schema to the JSON data you are currently working on. Here are some ways to set the schema for your data:

Assign a local schema file using the “Quick associations” pane

The most straightforward way is to use the “Quick associations” pane of the editor to select a local JSON schema file from disk for the current document. This assignment is saved and restored the next time you open the instance in the JSON editor.

Open a JSON schema from schemastore.org and automatically generate sample data

This method is explained in more detail in this article. You can use the “Open from JSON schema library…” dialog in the editor to automatically generate sample data from any schema available at schemastore.org. The schema is also assigned to the generated JSON instance.

The file-name is matching a specific pattern

A lot of entries in the JSON schema library available at schemastore.org are also defining a file-name pattern which is used to load a schema from the library to validate the JSON data. For example, if you load a JSON document with the name “test.bower.json” the data is recognized as “Bower package description file” and you get the following message in the results window of the editor:

Automatically assigned Bower schema from schemastore.org

Generate sample data from any JSON schema

As a quick way to get a JSON instance from any schema use the command to generate sample JSON data. This way a new document is created in the editor and the source schema is also assigned in a single step.

Using the built-in JSON schema generator

Do you want to quickly generate a basic JSON schema in your editor from any JSON input to avoid some typing that needs to be done every time you start writing a schema? A quick skeleton schema as a starting point with all current properties defined and their integral types already resolved? If yes, you can do this in JSONBuddy with ease.

This is how you do it in the editor:

  1. Open your JSON data as document. It doesn’t matter if you use the text or grid view.
  2. Use the following command to open a new document with the generated JSON schema: “JSON | Generate JSON schema from document”.
Generate a JSON schema from the current document in the editor

The generated schema is opened as a new document in the editor. Integral types are resolved and all objects which are not part of the top level are added as definitions to the schema. Equal object definitions will only appear once.

Automatic schema generation in the background

But even if you don’t use the command to generate a schema, a JSON schema is automatically generated in the background for any JSON document with currently no schema assigned. This schema is used to fill the Elements pane and to provide the entry-helper windows.

Custom formats for the JSON validator

Starting with JSONBuddy 4.6, you can add custom formats for the JSON validator as regular expressions using a simple configuration file. The JSON editor has got two new commands to give you easy access to this new functionality:

Commands for JSON custom formats

How to add and use custom formats?

Use the “Open JSON validator custom formats” command to open the JSON configuration file for custom formats directly in JSONBuddy. This is a standard JSON document and the default one will be loaded in the editor. You can then add your own entries to the JSON array for your validation tasks. Please note that you can also replace some existing formats which are already provided by the JSON validator of JSONBuddy. A user-defined format will override the built-in definition.

The standard configuration has the following entry:

[
  {
    "format": "my-custom-format",
    "regex": "^[a-z, A-Z, /]+$"
  }
]

As you can see all you need to do is to provide two simple strings to add a custom format. The identifier of the new format and a (valid) regular expression. After you have finished adding your new entries you simply save the configuration file and activate the new formats with the “Reload JSON validator custom formats” command. All open JSON documents are immediately validated using the new format definitions.

You can also see the names of your own formats on editing your JSON data in the editor:

library example with custom format definition

The “library” example, which is part of the standard installation, also uses a custom format. Just check it out and play around with different regular expressions.

JSON schema editor: Full support for draft 6

JSONBuddy continues to extend the support for JSON schema and fully supports draft 6 as the only available JSON schema editor. From now on (JSONBuddy 4.6), you can validate your JSON files against draft 6 directly in the editor. In addition, you can also start using draft 6 in the command-line tool, which is part of the JSONBuddy software package, to run your batch validation tasks.

JSON schema draft 6 is supported by the following components in detail

  • JSON validator – Also available for background validation and live error indicators in text view
  • JSON schema editor – Full entry-helper support for new draft 6 keywords, schema validation and schema specification as help text.
  • JSON schema analyzer – Support for draft 6 schema keywords.

With JSON schema draft 6 and the integrated easy access to the schemastore.org schema library, JSONBuddy provides the most comprehensive support for JSON schema available. And JSONBuddy will also continue to implement the latest versions of the JSON schema standard in the future.