Tales from support: Reading a JSON log file

So, I got this message not too long ago from a new user of JSONBuddy.

The user wrote: “Trying to read log files generated with NLog in Json format. JSONBuddy JSON editor complaining about format. Example data from file: { … some sample data… }”

Apparently, the user, let’s call him John to make this sound less “robotic”, was experiencing issues with reading a JSON log file generated with NLog and he was curious if JSONBuddy can help as a mature JSON editor.

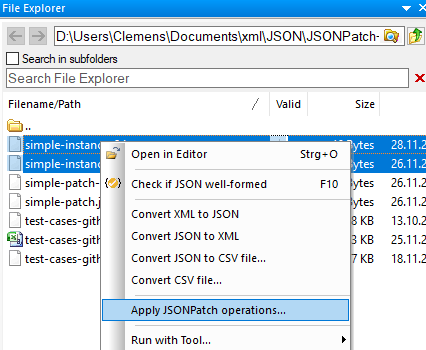
Use JSONBuddy to open your log data

First things first, JSONBuddy wholly and thoroughly supports log files presented in JSON format and unsurprisingly so. Asides from being readily readable in your JSON editor, a trait not so many other log formats can boast of having, the JSON data format shines outstandingly in that it presents data in a reasonably compact and heavily structured form.

What this means is that your log files gains attributes typically associated with big data – it is layered as you would find in traditional database architectures and finely structured to make querying, analytics, or troubleshooting less of a hassle than it normally is.

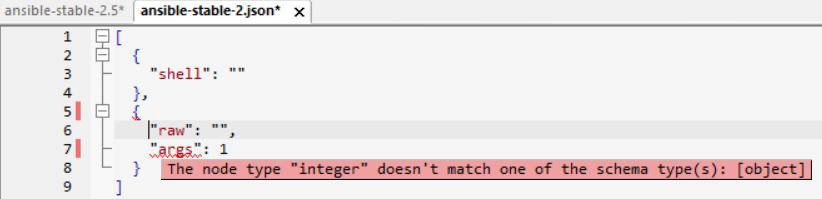
So back to John now. His issue was essentially down to the fact that JSONBuddy was having a hard time recognizing the log file he was browsing in the JSON editor. And that’s because JSON supports an increasingly wide array of data structures including but not limited to Objects, Arrays, Strings, and Values. Each data structure has its peculiarities and as such, is handled differently by the JSONBuddy editor.

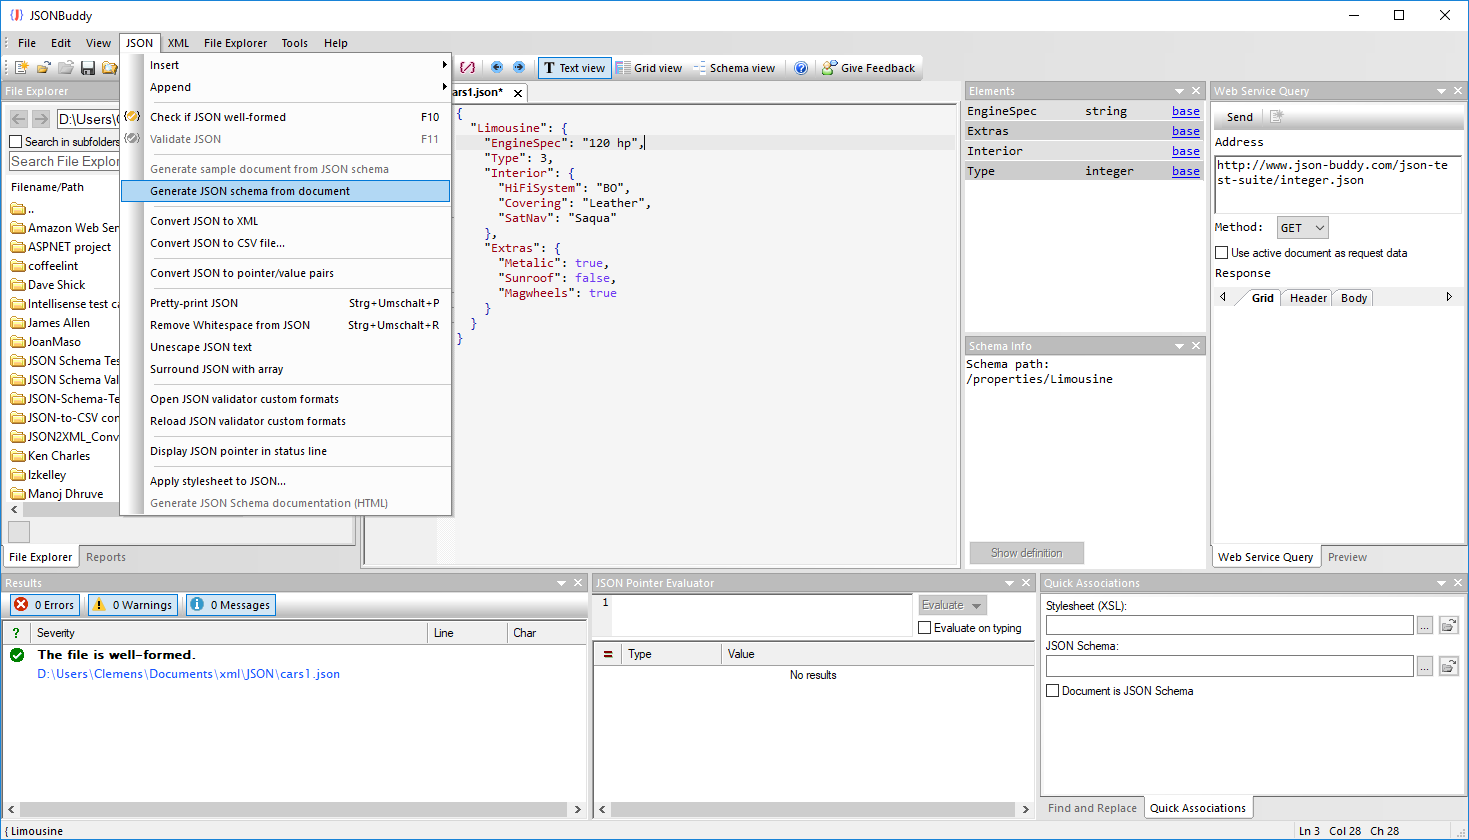
Convert a sequence of JSON objects into a valid array

To make headway, all John had to do was point JSONBuddy to the data structure inherent in the NLog derived log file. In his case, the log files was a sequence of JSON objects, and that meant using the “Surround with JSON array” command is the thing to do. One click and voila, JSONBuddy came to terms with the input before proceeding to accurately render it in the JSON editor.

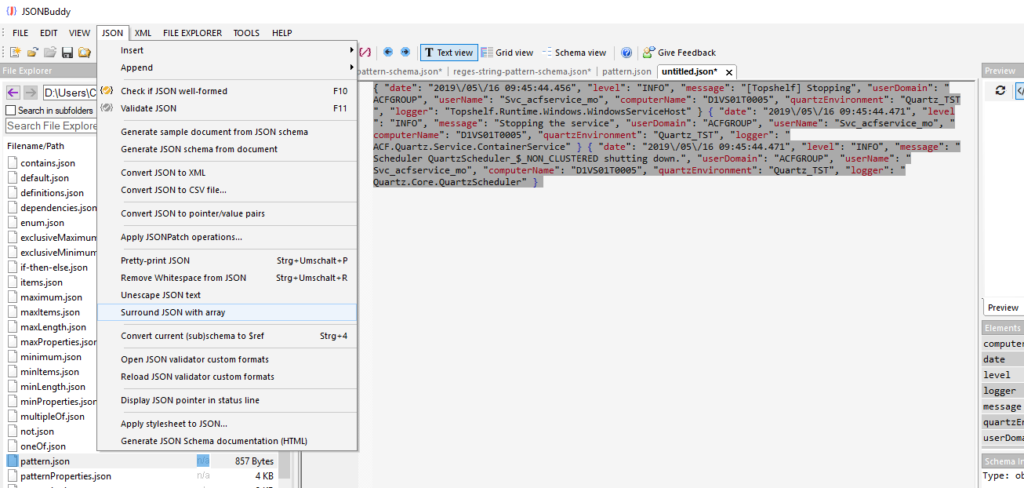
The command will format the current selection or the whole document if no selection is set. You will get a well-formed JSON array afterward in the editor window and you can pretty-print it using Ctrl-Shift-p. Moreover, you can also open the log in the Grid window.

I simply sent John a message explaining those steps, and a few minutes later, I got an affirmative “Thank you” as a reply. One more happy client!

Full JSONPatch support in JSONBuddy

JSONPatch allows modifying JSON data with a set of operations defined itself as a JSON array. JSONBuddy 5.1 supports the complete JSONPatch specification directly in the editor to apply any number of operations to any number of JSON documents.

Just a few details to get an idea what JSONPatch can do for you. A simple JSONPatch operation could look like the following example:

[ { "op": "copy", "from": "/baz/0", "path": "/boo" } ]

In words, this operation copies the value from the JSONPointer “/baz/0” to the location at the JSONPointer “/boo”. So applied to the following JSON input:

{
"baz": [ { "qux": "hello" } ],
"bar": 1
}

You get the following JSON as result:

{
"baz": [ { "qux": "hello" } ],
"bar": 1,
"boo": { "qux": "hello" }
}

As you can see, the value from the first item of “baz” array is copied to the root as a new value named “boo”. It doesn’t matter, that the “boo” property didn’t exist beforehand.

Apply JSONPatch operations from the built-in File Explorer.

If you want to apply JSONPatch operations to one or more JSON data documents, select the files in the built-in File explorer first. Then use the context menu to get a standard file dialog to select the JSON with the array of JSONPatch operations.

Apply the JSONPatch operations to the active document

If you want to modify the current JSON document in the editor using JSONPatch operations, set the focus to the document and use the “JSON | Apply JSONPatch operations…” command from the main menu bar. This will also open a standard file dialog where you can select the JSONPatch operations to apply.

Use JSONPatch from the command-line tool

In addition, the latest command-line tool has also support for JSONPatch. Simply use the “patch” option to apply a set of JSONPatch operations to any number of JSON data files:

valbuddy.exe -patch "D:\Documents\JSON\JSONPatch-Test-Suite\simple-patch.json" "D:\Documents\JSON\JSONPatch-Test-Suite\simple-instance.json"

Where the first parameter after the “patch” switch is always taken as the JSON input with the array of JSONPatch operations. All following parameters are taken as paths to JSON documents to apply the modifications.

As usual, you find the “valbuddy.exe” command-line tool in the installation folder of the JSONBuddy editor software package.

JSON schema editor with $ref resolving

Being able to navigate quickly and conveniently in your JSON schema can make a big difference while you are working on your schema definitions. Here is a sample screen-shot directly from the JSON schema editor environment of JSONBuddy of the “Unity Assembly Definition” schema available at schemastore.org:

The editor resolves the target locations of all $ref keywords in the current schema and displays them as active links. The resolved JSON pointer and the path to the schema are shown as part of the info window if you move the mouse over the reference.

You get instant feedback if the $ref value can be resolved together with the target location and you save time by clicking the link if you need to take a closer look at the schema node.

Amazing navigation features

Hold down the Control key and left-click on the link to jump directly to the resolved JSON schema node.

An additional tip to quickly navigate in the JSON schema editor: Use the Navigation-history back shortcut “Control-Shift-,” to jump back immediately to the $ref keyword.

Altogether some outstanding enhancements for the JSON schema editor.

Using the built-in JSON schema generator

Do you want to quickly generate a basic JSON schema in your editor from any JSON input to avoid some typing that needs to be done every time you start writing a schema? A quick skeleton schema as a starting point with all current properties defined and their integral types already resolved? If yes, you can do this in JSONBuddy with ease.

This is how you do it in the editor:

  1. Open your JSON data as document. It doesn’t matter if you use the text or grid view.
  2. Use the following command to open a new document with the generated JSON schema: “JSON | Generate JSON schema from document”.
Generate a JSON schema from the current document in the editor

The generated schema is opened as a new document in the editor. Integral types are resolved and all objects which are not part of the top level are added as definitions to the schema. Equal object definitions will only appear once.

Automatic schema generation in the background

But even if you don’t use the command to generate a schema, a JSON schema is automatically generated in the background for any JSON document with currently no schema assigned. This schema is used to fill the Elements pane and to provide the entry-helper windows.

JSON editor and validator for large schemas

Sometimes it can happen that a JSON schema is generated from existing data and the resulting schema is quite huge. And maybe this schema is just taken as a starting point and you need to extend or modify it to get the final specifications for your JSON input.

One example of a really huge JSON schema is the Ansible schema available from schemastore.org (Please take a look at this blog entry to see how easy it is to open any schema from schemastore.org in JSONBuddy). The Ansible schema has currently more than 100.000 lines and 5 MB of JSON text. For this task, you need a good JSON editor which can also handle quite large files.

JSONBuddy: The editor for large JSON schemas

JSONBuddy is capable of loading big schema documents. The editor will apply syntax-coloring, entry-helpers and code folding as it does for a typical schema. You also don’t have to work on your schema without the context-sensitive help of getting the specification text for the keyword you are currently editing. All of this is also functional for big schemas.

But there is more. For example, besides being able to edit a JSON schema as you are used to, you get an instant evaluation from the built-in JSON schema analyzer. The schema analyzer runs in the background and is also active for large schema documents. For example, if a certain definition is not used in the local schema, there is no need to run an explicit find operation:

Inserting a new definition in a JSON schema with more than 100k lines

And this also works the other way around, whenever you add a $ref keyword to your JSON schema in the editor, the analyzer will tell you if the referenced definition can be successfully resolved.

“And do I get those nice validation error indicators which are saving so much time on editing my JSON content in the editor?” Yes, you do:

Active background validation on using a huge JSON schema

JSON editor in a nutshell: Using JSON pretty-print

Maybe, you often have to deal with JSON data which is not formatted as you like or has no white space at all. As an example, it is hard to edit this JSON text in the editor:

JSON data with no white-space is hard to read
JSON data with no white-space

What you need is an editor that a) understands the JSON syntax and b) can quickly format your JSON data hassle-free.

Format JSON data with no white space in the editor

In JSONBuddy, just use the pretty-print feature to format the current text content at any time. The keyboard shortcut for the pretty-print command is Ctrl+Shift+p (you can change the shortcut in the “Options…” dialog). There is also a menu item at “JSON | Pretty-print JSON”. After the formatting the JSON data is much more readable and can be easily modified in the editor:

JSON data after running the pretty-print command.

Note that short array content is aligned at a single line (available with JSONBuddy 5). This makes the JSON more compact and is saving space in the editor window. This is also true for arrays with only primitive types and having no long string values. As a consequence, arrays with many items of only primitive types, often numbers, are still displayed in a compact way with no new-lines separating the single items. In contrast, arrays with long string values are displayed with each item on a new line to increase readability. The editor applies an adaptive JSON formatting based on the actual content.

Use pretty-print in combination with the navigation history

The pretty-print functionality is getting even more powerful in combination with the navigation history of the JSON editor. If you format your JSON data while you are adding new properties, objects or arrays, the navigation history sets the text selection to the current property, after you applied the formatting operation.

You can also use the “Navigate Backward Ctrl+Shift+,” and “Navigate Forward Ctrl+Shift+.” commands to navigate through the selection history as you need.

Tales from support: JSON code folding

Someone who set “Recommend: yes” and “Overall quality: 1” (best) on the survey form sent the additional following feedback:

Code folding for JSON file does not work for situations like: “RaceCar”: { “Domestic”: true, “Model”: [] }

Unfortunately, the user did not provide an email address so I couldn’t get in contact with her/him. So what is the JSON editor doing with JSON data like this in terms of code folding? The sample data is all in one line. There is actually no chance for the editor to show code folding for JSON content that spans over a single line.

Use JSON pretty-print to show code folding

However, if you are using JSONBuddy as your JSON editor you also get a very useful pretty-print functionality that can be quickly executed by just pressing Ctrl-Shift-P. The sample JSON is immediately formatted in the following way:

Formatting JSON with pretty-print in JSONBuddy

As you can see, folding is available after the JSON data is formatted in the editor. It is also convenient that the current selection is also preserved after the pretty-print operation is completed. Maybe a small but important detail to provide the best JSON editor experience possible.

Tales from support: Picking the right editor view for large JSON data

A user sent me an inquiry about opening large JSON data in JSONBuddy. This can be indeed a little bit tricky if the default view for JSON data is set to the Grid view in the editor settings. Not all data is suitable to be displayed in the Grid view. JSON with a lot of child properties at the same parent could take a lot of processing time and memory if you want to show the JSON as Grid in the editor. So the user wanted to get some help:

I don’t believe this is a fault in your software, as all other editors seem to be overwhelmed by the 450,000 rows as well… I was just curious if you had any tips that may help improve the performance of this application…. As without better performance, I cannot justify purchasing a license.

And I replied:

450,000 rows in total is not that much as I’m frequently working with files with several millions of lines. I recommend to use the text view modes of JSONBuddy (and XML ValidatorBuddy) if you are working with really large files. Using the text view, the editor supports two modes. The standard view which loads all of the file content and the Large File view which always only keeps parts of the content in memory.

Set the default view to text for large data

As a first step set the text view as the default view for your large (JSON, XML or any text format) data. Please learn more about this here.

Set a limit in MB for the Large File text view in the editor

How can you set the limit for the Large File view? There is a setting in the Options dialog on the Editor page which sets the limit in megabytes for using the standard view:

Option to set the limit for the Large File view

Any file larger than the limit will be loaded in the Large File view. Using the Large File view it is no problem to browse files even with a size of several GBs. Please note that you would need a plus license of XML ValidatorBuddy (a Plus version of JSONBuddy with support for large file editing will be available in the near future) if you want to edit the file. In general, avoid the Grid view for large data and use the Large File view in the text editor.

Instant validation while editing JSON data

Are you tired of clicking the “Validate” button or pressing F11 every time you want to know if your JSON data has still some validation errors? Then there is the good news. With JSONBuddy 4.5 you don’t need to run the JSON validator explicitly anymore while you are working on your JSON data in the editor. Instead, you always get all issues displayed as text indicators instantaneously and directly in the JSON editor. You also get the error message shown as call-tip if you hover with the mouse over the indicator for a short while:

JSON validator runs in the background in the editor

Instant validation at any time

This allows a new way of working with JSON documents in JSONBuddy. You just open the JSON and if there is already a schema assigned, you can immediately see if the JSON data has errors or not. And to make it easier to fix any issues and to know what values are actually available for the enumeration, the editor will also display an entry-helper if you are going to fill the property:

Enum values from the assigned JSON schema

So in summary, you always see any errors immediately and you get instant help if you want to fix them in the editor while you are editing your JSON data. Both make working with JSON more convenient and help to save time. Two important things to provide the best JSON editor experience possible.

Tales from support: Spaces for indentation

During the development of JSONBuddy 4.5 we got a customer inquiry about the need to use spaces instead of tabs for indentation levels in the JSON editor. So we added this setting to the “Editor” page of the “Options” dialog:

Option to use tab or space for indentation

If you remove the check from the “Use tabs for indentation” check-box, the editor will insert spaces to set the indentation level for every new line. This setting is also used for JSON pretty-print and the various conversion operations of JSONBuddy.

Please keep in mind that this doesn’t replace any tabs which are already inserted. Any existing JSON data with either spaces or tabs as indentation will keep the characters currently used. In addition, the indentation functionality copies the white-space characters from any previous line. So don’t be confused if any new line has still tab characters inserted because the previous line uses tabs as indentation. Any new document in the JSON editor will use the setting from above right from the start.