

Confirm which schema governs the data
The JSON Schema specification does not define a universal way to assign a schema to a JSON data file. An application can use a local association, metadata such as a transmission header, or a filename pattern. JSONBuddy provides several desktop paths.
Assign a local schema for the current document
Use the Quick Associations pane to select a local JSON Schema file for the JSON document you are editing. Check the selected association before validating or editing the document.
Use a schema-library workflow when it matches
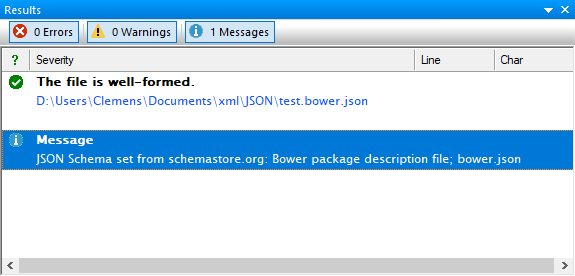
The editor can open a JSON Schema from schemastore.org and generate sample data from it, assigning that source schema to the new instance. Library entries can also supply filename patterns: the Bower example reports the matching schema for test.bower.json. Review the reported schema name and source before accepting an automatic match.
Generate data from a schema deliberately
The established command to generate sample JSON data creates a new document and assigns the source schema in one step. Use it to explore a schema, then review generated values and validate the result; sample output is not evidence that every real data case is accepted.
Verify before and after validation
- Confirm the selected root schema and any references resolve in the expected context.
- Check the result pane for the association message or the intended local schema path.
- Run a representative valid and invalid data example.
Continue with the schema workflow
Use the JSON Schema editor to refine the contract, inspect resolved references, or use the JSON Schema tester to validate a managed collection of files.