Use the "JSON | Convert JSON to CSV file..." command to convert JSON input to CSV tables. This command is enabled after selecting a file in the built-in "File Explorer" or an active document is loaded on the Editor tab. To start the conversion, use the dialog to set various options to locate the JSON array and to format the CSV output.
To avoid size limitations, the conversion process is using a full streaming mode for reading all JSON input and writing the generated CSV output.
A JSON to CSV conversion can be started for the current document and also for (multiple) files selected in the built-in File Explorer window. To use the File Explorer, select one or more files in the list and use the "Convert JSON to CSV file..." command from the right-click context menu of the Explorer window.
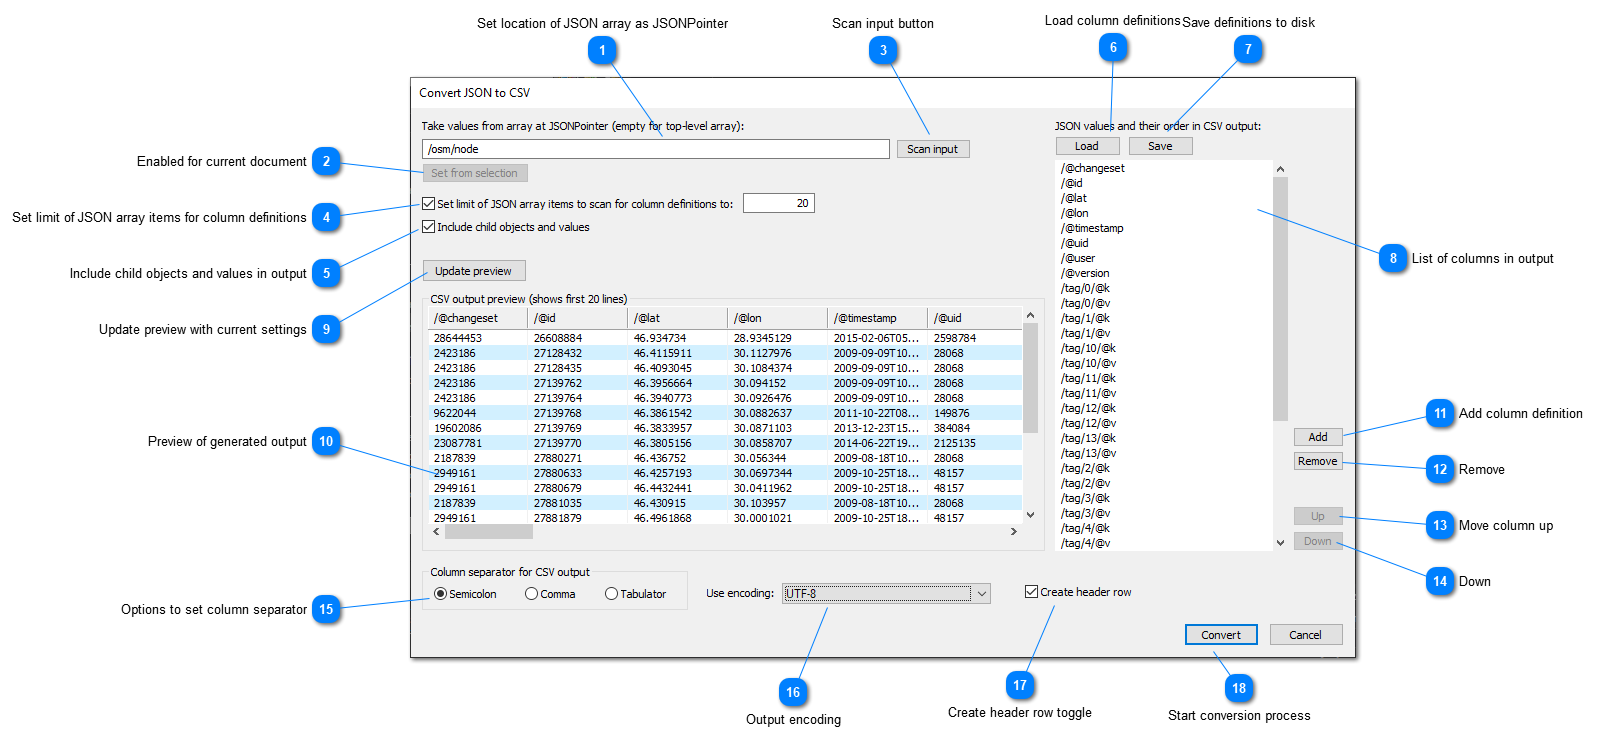
Set location of JSON array as JSONPointer
JSON pointer to set the location of the array where the conversion process will start. The right-click context menus of the text and Grid views provide commands to copy the JSONPointer of the current selection to the clipboard. Use those commands to make it simple to set the location of the JSON array.
This button is enabled if the current document is converted to CSV and a valid JSONPointer for the current selection is available. On clicking this button the current JSON pointer is copied to the location field.
This list contains all of the JSON values which will be converted to CSV. You can add values set as JSONPointers using the "Add" and "Remove" buttons. The column labels are actually JSONPointer fragments relative to the starting level within the JSON input.
In general, the conversion process takes all JSON values it can find at a specific array in the JSON document. This location can be the root of the JSON data or any other valid JSONPointer.
A list of JSON values is updated whenever the "Scan input" button is clicked. The list of column definitions can also be used to change the order in the CSV output, to remove values from the output and to add values which were not detected automatically. Use the "Remove" button to skip a JSON value in the CSV output. In order to move a value up or down select the value from the list and use the "Up" or "Down" buttons.
The "Take from selection" button is enabled if the dialog was opened from an active document on the Editor tab. In this case the JSON pointer location is taken from the current selection in the JSON data.
To generate the actual output, use the "Convert" button. This will open a new document in the editor with the conversion results as CSV. Afterwards you can save the CSV data with the standard "File | Save" command.
Error reporting
It can happen that not all of the JSON input can be converted to CSV. For example, the JSON input could have syntax errors at a specific line. Any available CSV output is written to a new document and the standard "Results" window of the application will then display all of the reported errors. Please note that not all of the JSON input is converted in this case.